
AI Configuration
Connect a supported provider, test your own API key, and choose from the live model catalogue in WordPress
Configure AI in four steps
1Open AI Configuration
In WordPress, go to ProRank SEO → AI Tools → AI Configuration.
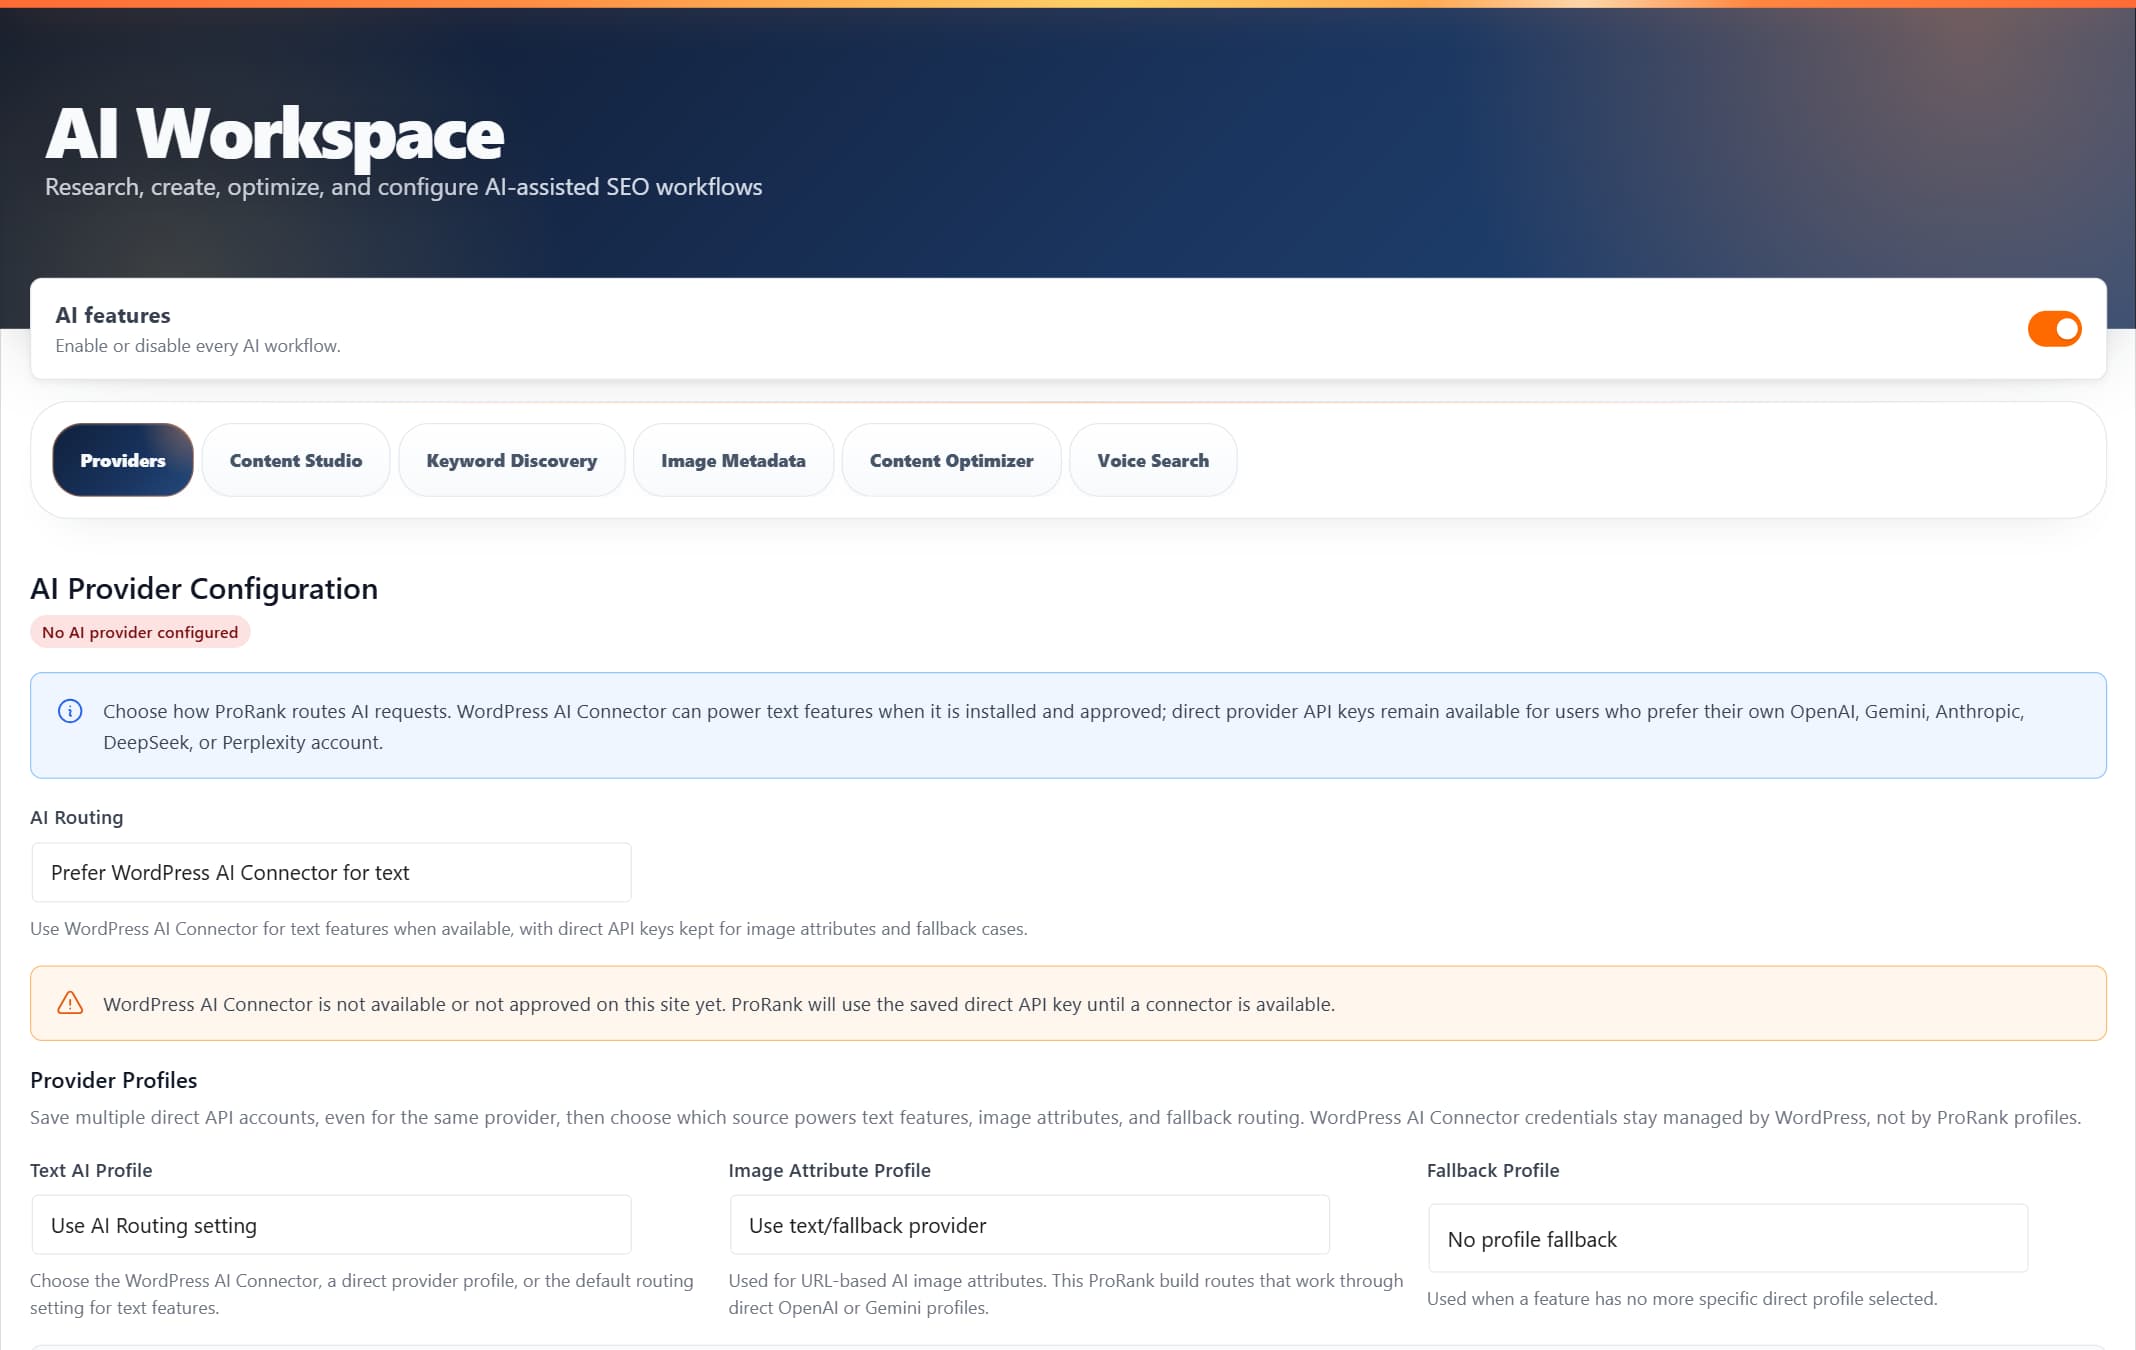
ProRank 1.6.0 · WordPress demo · Captured 5 September 2026
2Select a provider
Choose the provider that fits the task, data policy, region, and budget.
OpenAI
General content and metadata workflows
Anthropic Claude
Long-form writing and editing
Google Gemini
Fast general-purpose generation
DeepSeek
Cost-conscious bulk workflows
Perplexity
Research-oriented generation
3Save and test your key
Use a dedicated provider key and verify the connection before enabling AI workflows.
Provider credentials
Create the key in the provider console. ProRank stores it in an encrypted server-side credential option and does not issue or resell provider tokens.
Limit exposure
Set provider-side budgets or quotas where available, and rotate a key immediately if it is exposed.
4Choose from the live model list
Select a model shown by the plugin rather than copying a model ID from an older guide.
ProRank validates the provider/model pairing and keeps a release-specific catalogue. A provider may retire a model or change access independently of ProRank.
If a previously working model fails, refresh AI Configuration, choose another supported model, and check the provider status and billing pages.
Connection checklist
- The provider connection test succeeds.
- The selected model appears in the plugin catalogue.
- Provider billing or quota is active in your region.
- A small draft completes before starting a bulk operation.
- Generated SEO copy is reviewed before publishing.
- The API key is never exposed in public page source.